Business owner guide
As the owner you set up the business, invite people, run customers and jobs, and decide who can see what. Owners can do everything in TradieDash for their own business, and nothing in anyone else's.
Your account
Create your business account at tradiedash.com.au ("Get started with TradieDash"). You become the owner, with a 14-day free trial and no card needed. You need a verified email address before you can invite people.
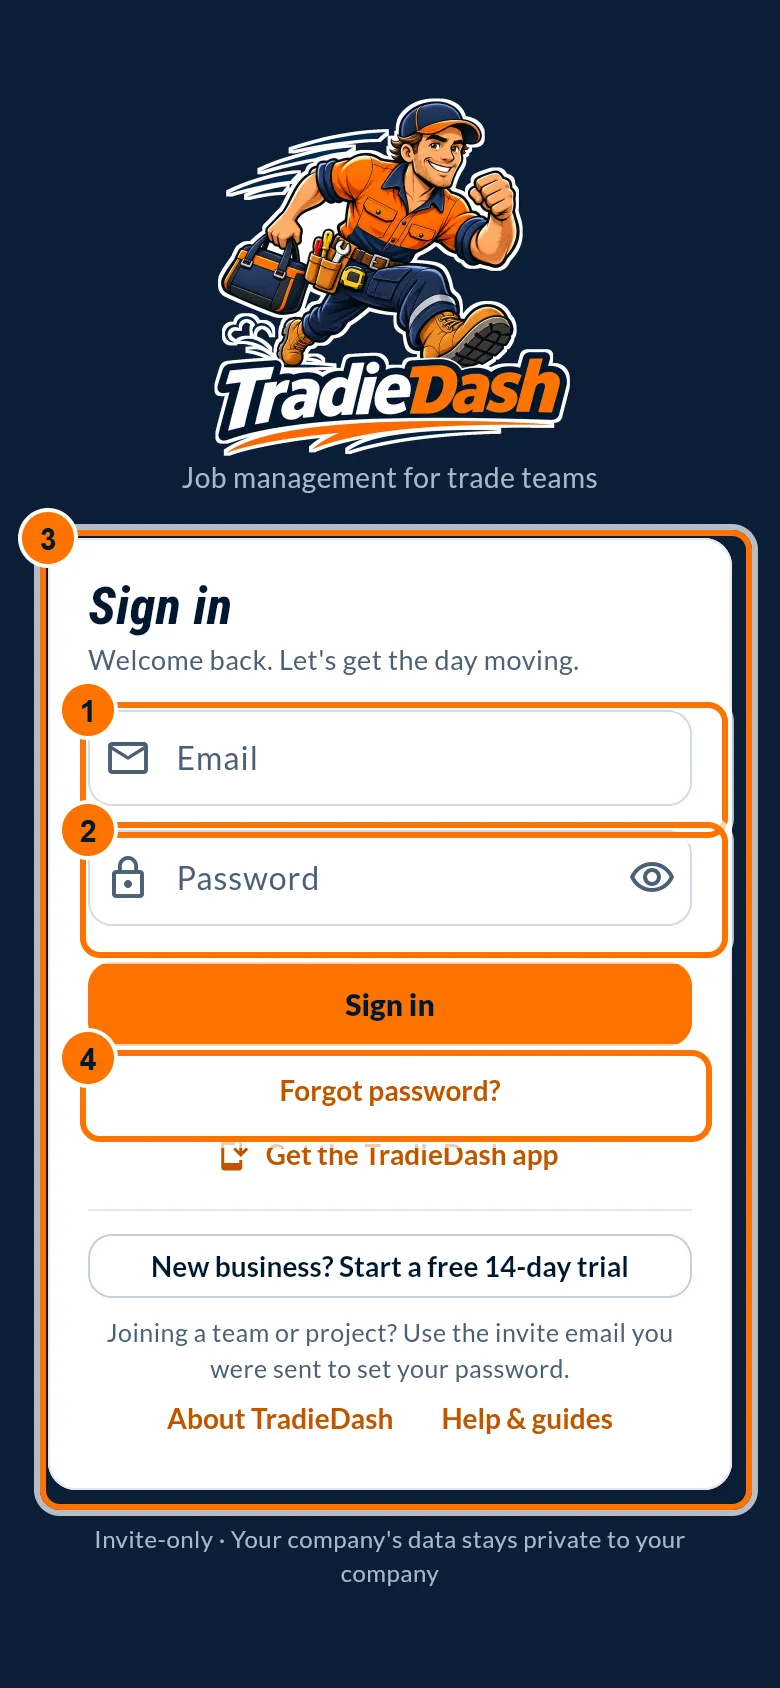
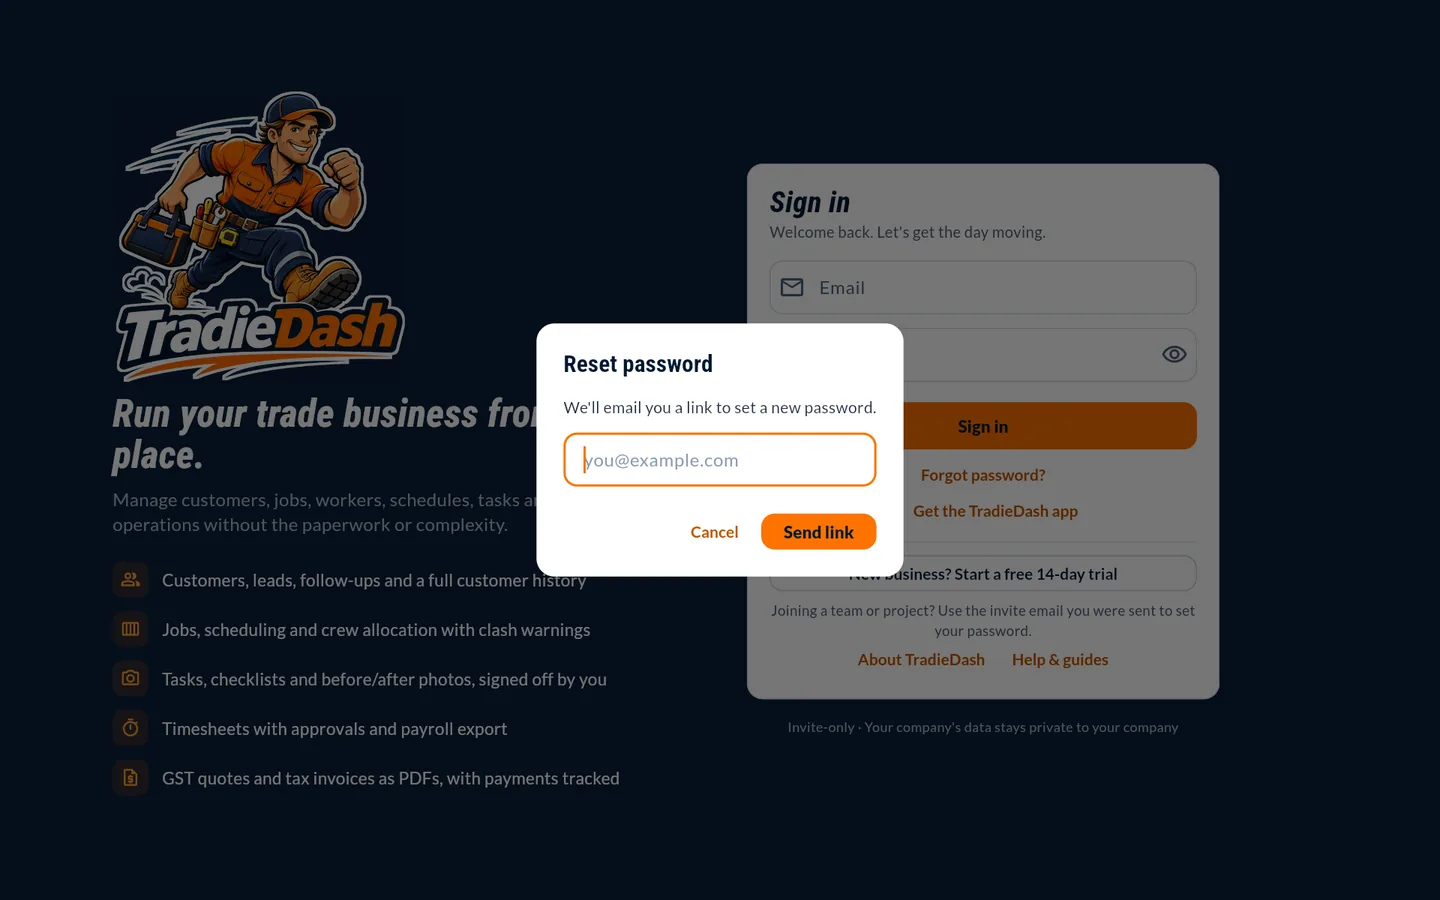
- Open the invitation email ("Reset your password for TradieDash"), choose a password and press Continue.
- Sign in at tradiedash.com.au/app (or tap Sign in on the website).
- To change your password later, use the person icon (top right) → Change password.
Common problems
- "This account isn't linked to a business yet".
- Your sign-in works but isn't linked to a business yet. Contact TradieDash, or the business that invited you.
Company details and time zone
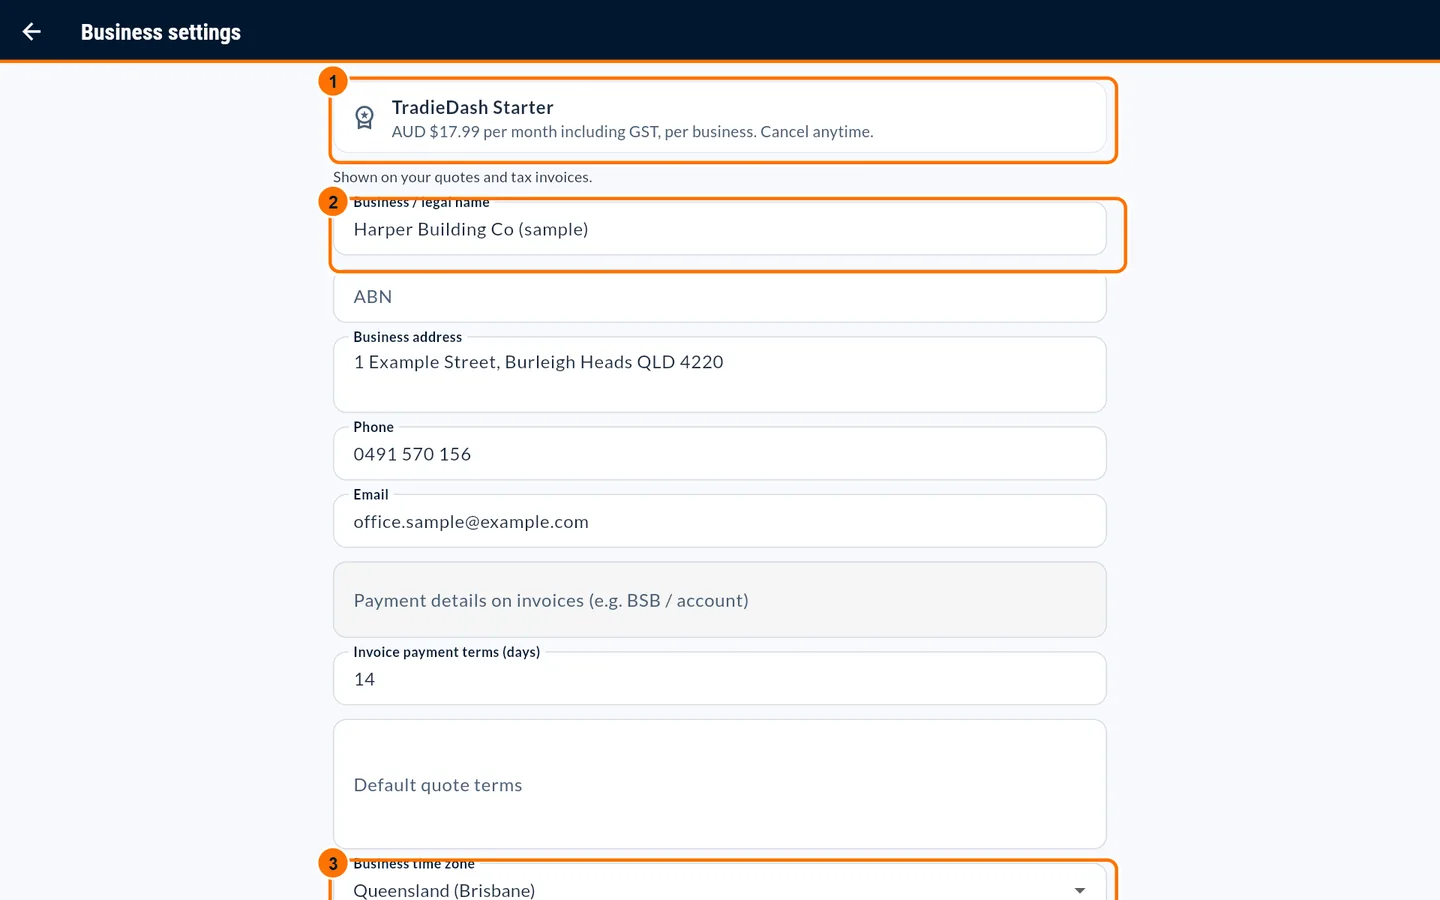
Your legal name, ABN, address, phone, email, payment details and quote terms appear on quotes and tax invoices. The time zone controls how follow-up dates show for everyone in your business.
- Go to More → Business settings.
- Fill in the details and choose your time zone (Queensland/Brisbane by default).
- Press Save.
Common problems
- Fields are greyed out.
- Only the owner (Admin) can edit business settings. Office staff can view them.
Setup checklist and tours
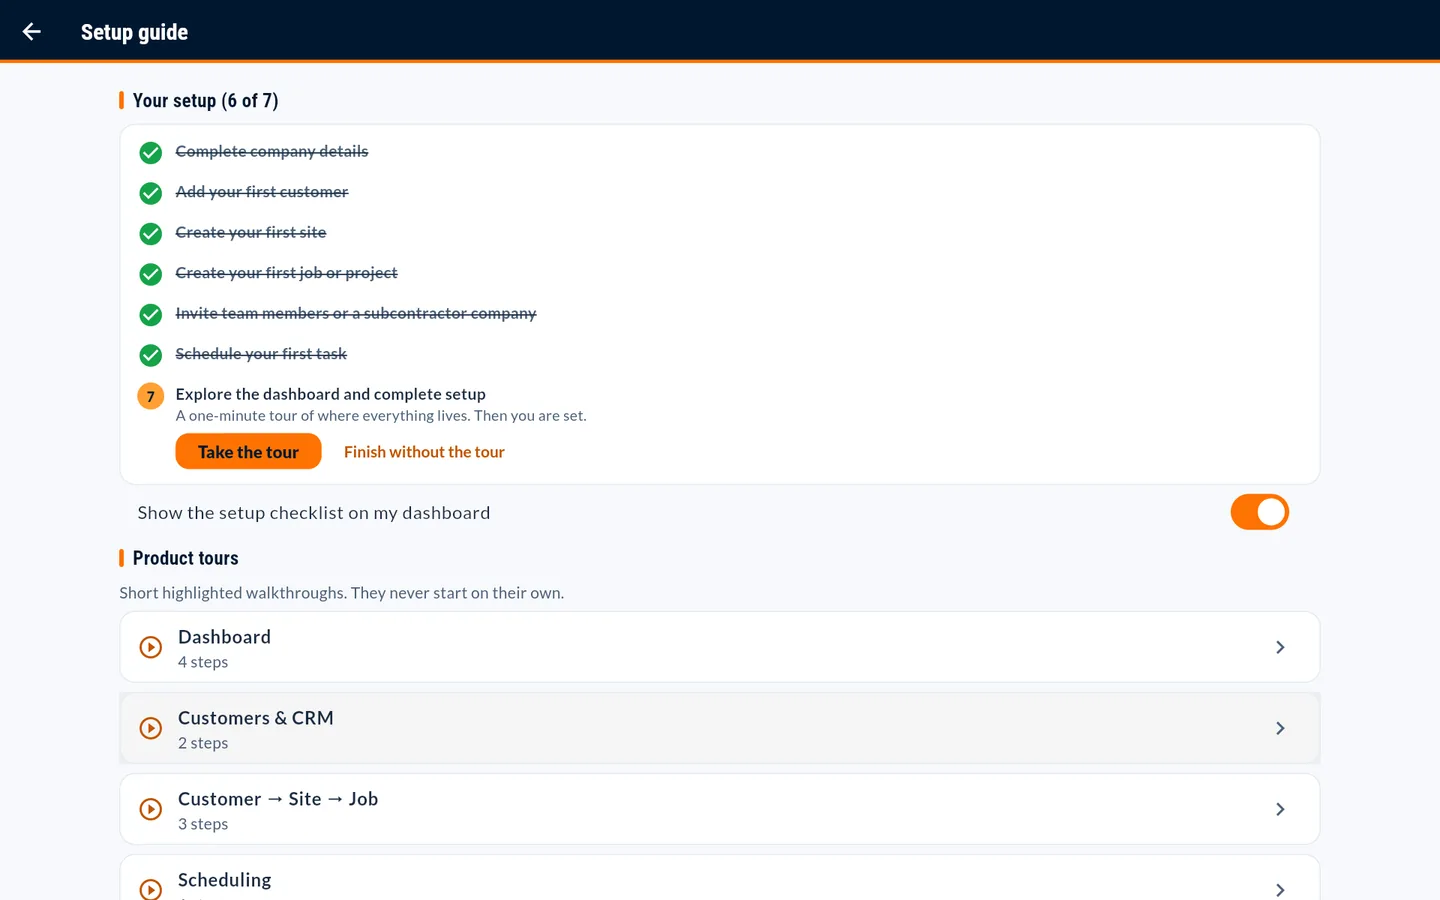
A 7-step checklist built from what you have actually done. It never blocks you from working.
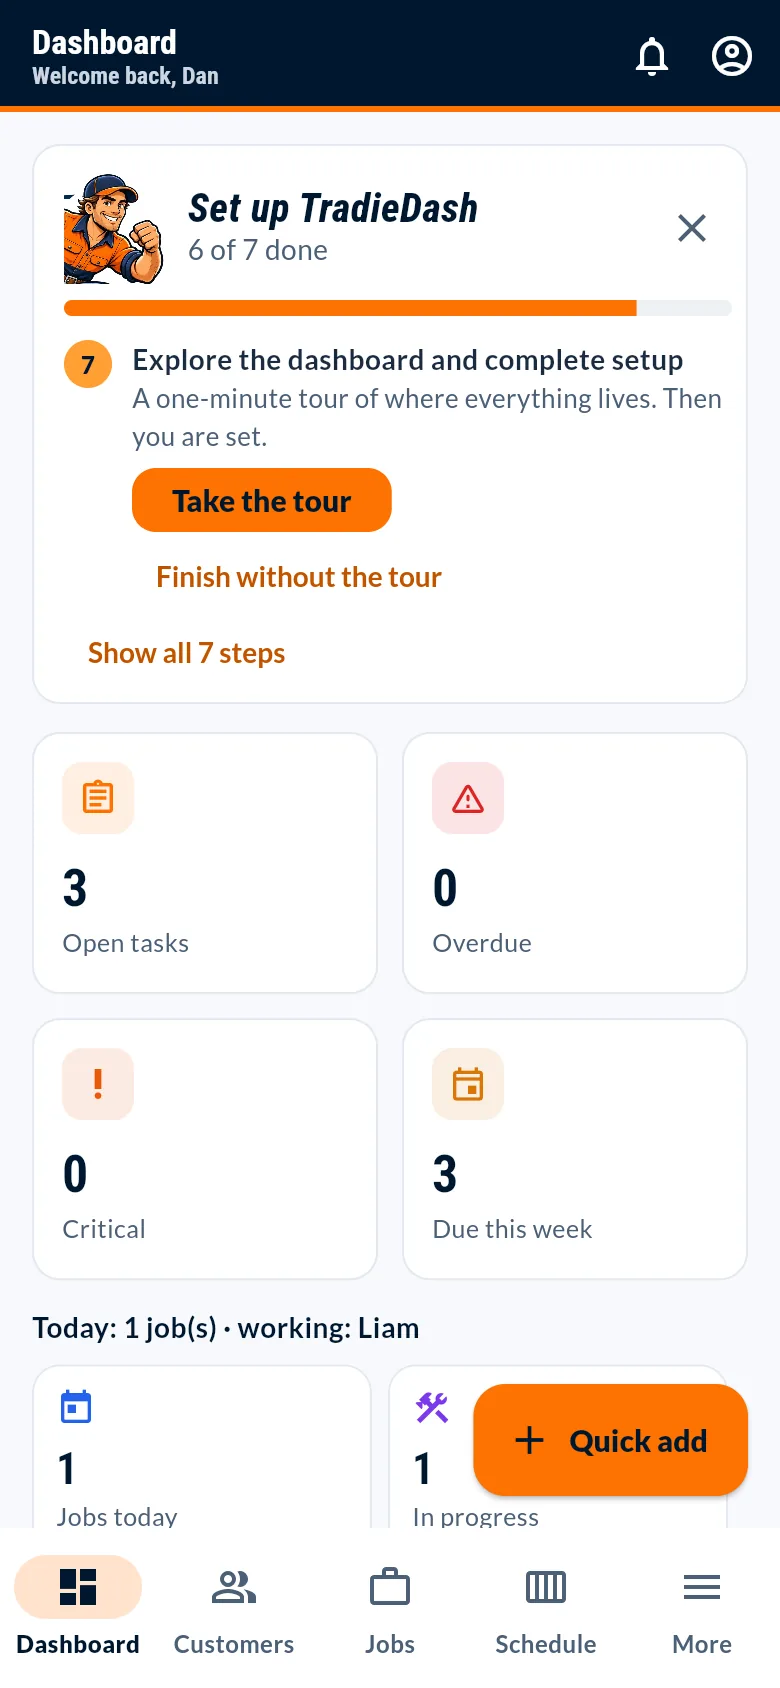
- Work through the checklist on the Dashboard, or hide it with the X.
- Open More → Setup guide for the full list and one-minute product tours.
Adding and managing customers
Customers keep contacts, sites, jobs, quotes, invoices, documents and follow-ups together.
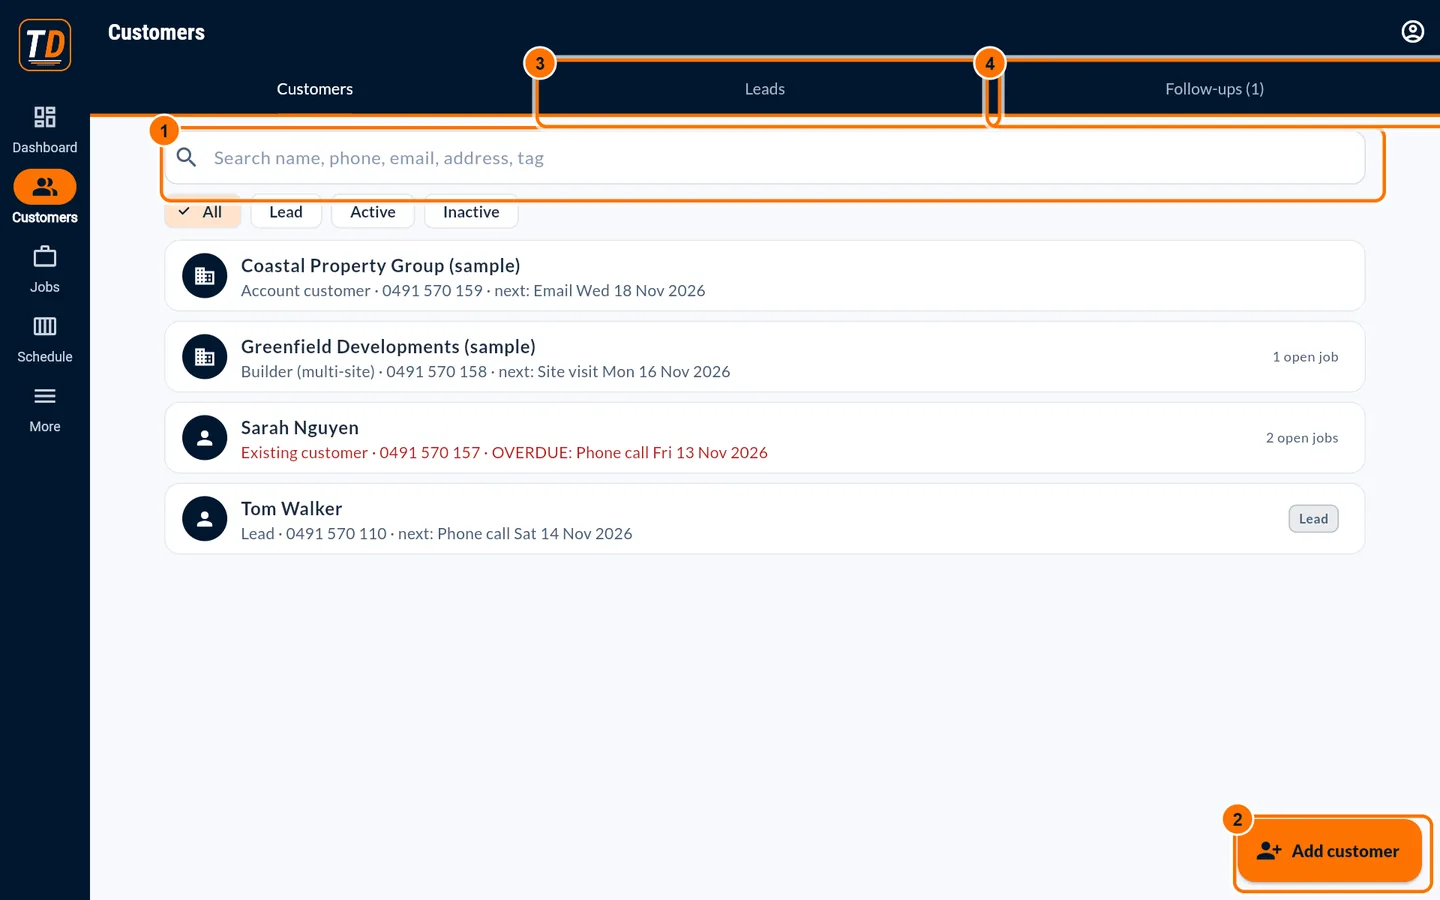
- Go to Customers and press Add customer (bottom right).
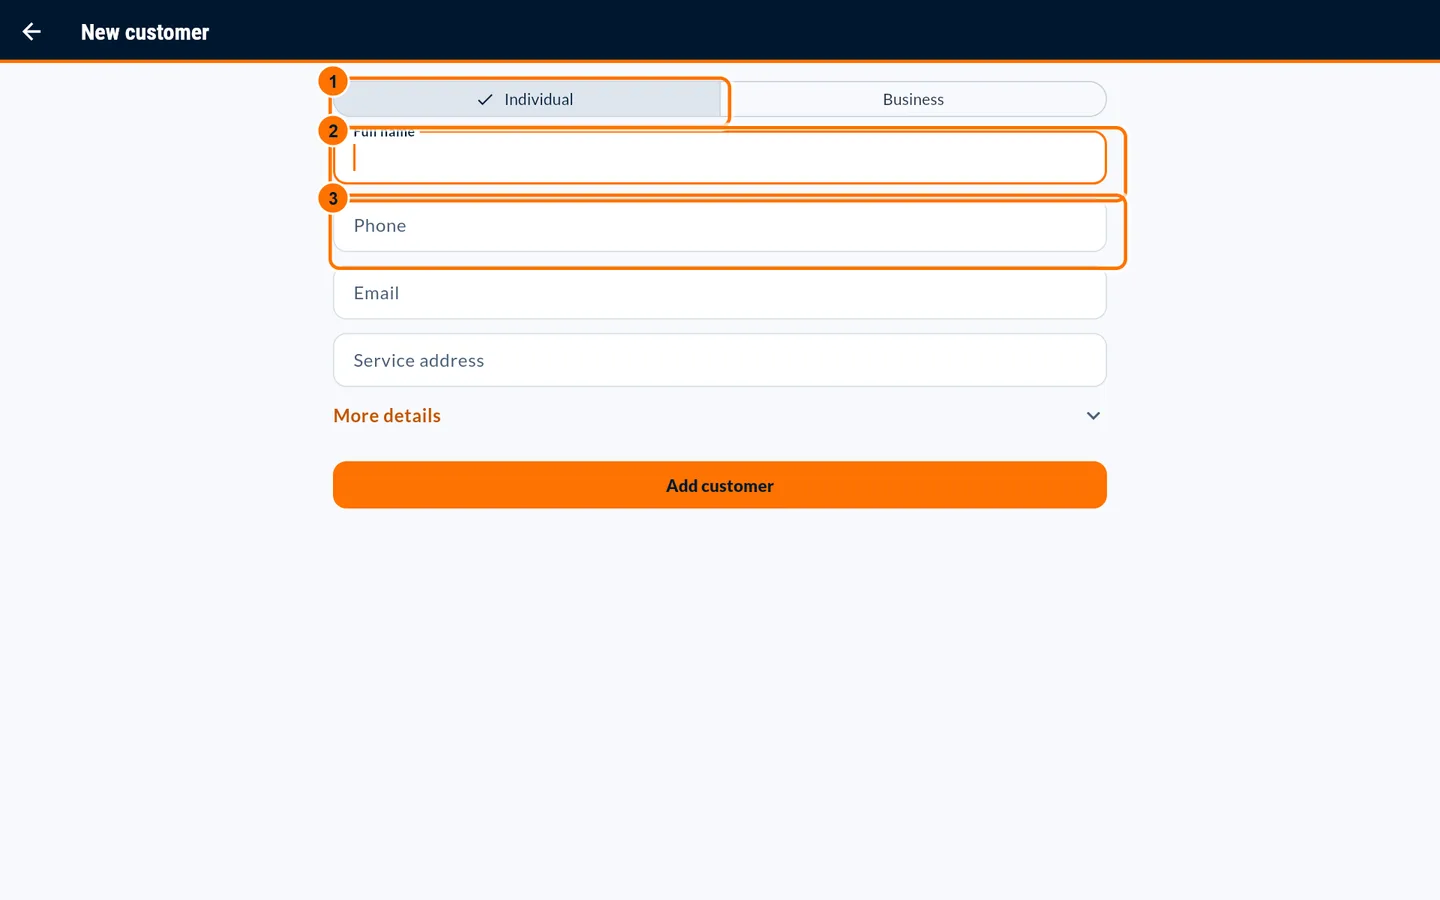
- Choose Individual or Business, then enter the name, phone, email and service address.
- Press Add customer. If someone with the same phone or email already exists, TradieDash warns you first.
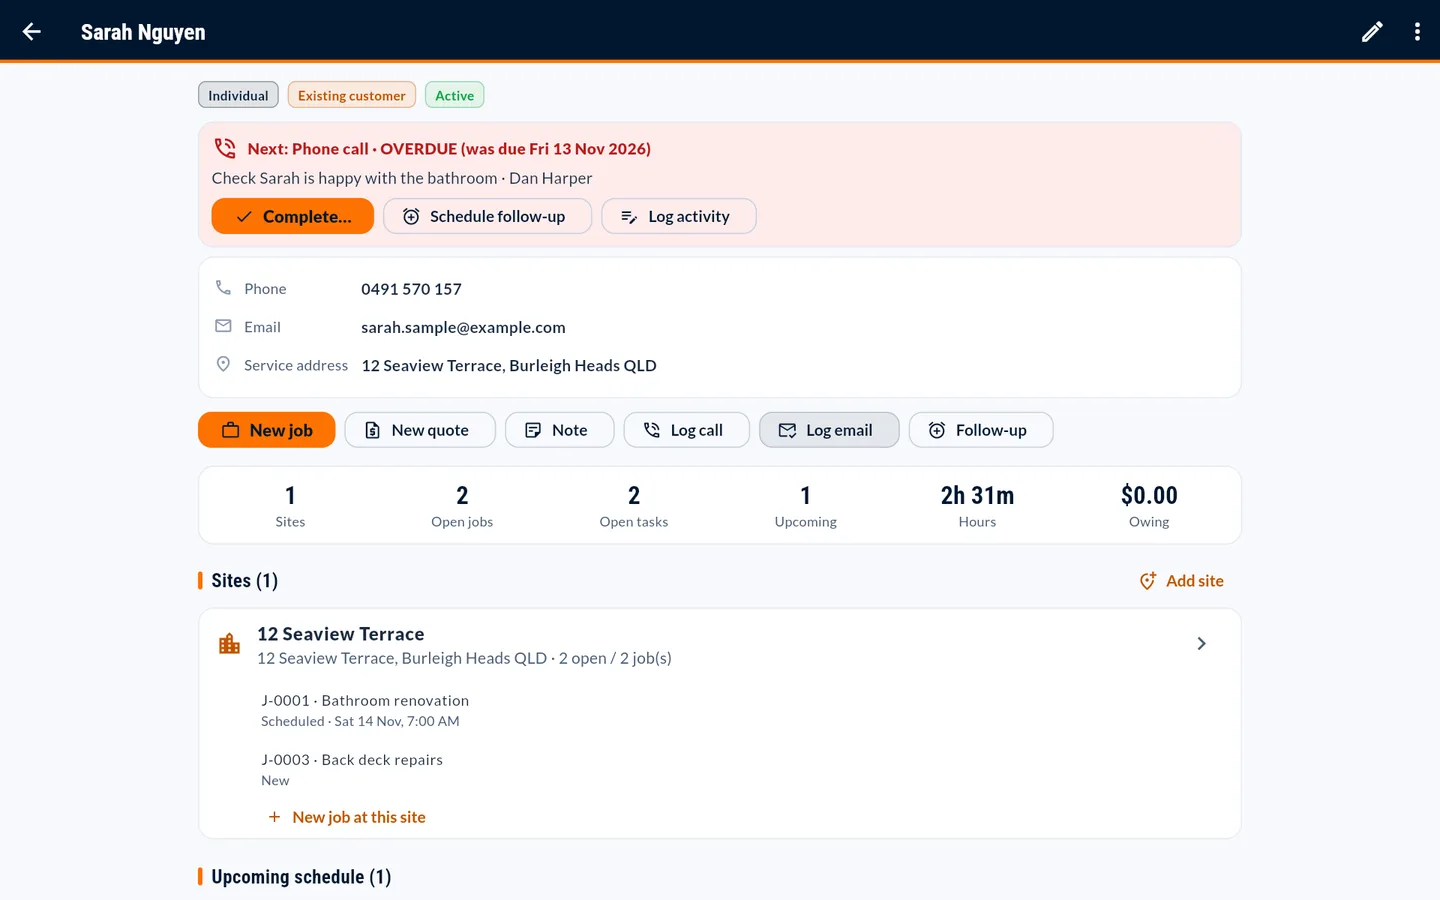
- Open a customer to see their jobs, quotes, invoices, documents and history, and to log calls, emails and notes.
Common problems
- I can't find a customer.
- Use the search box (name, phone, email, address or tag), and check the Active/Inactive filters. Archived customers are hidden.
Managing leads
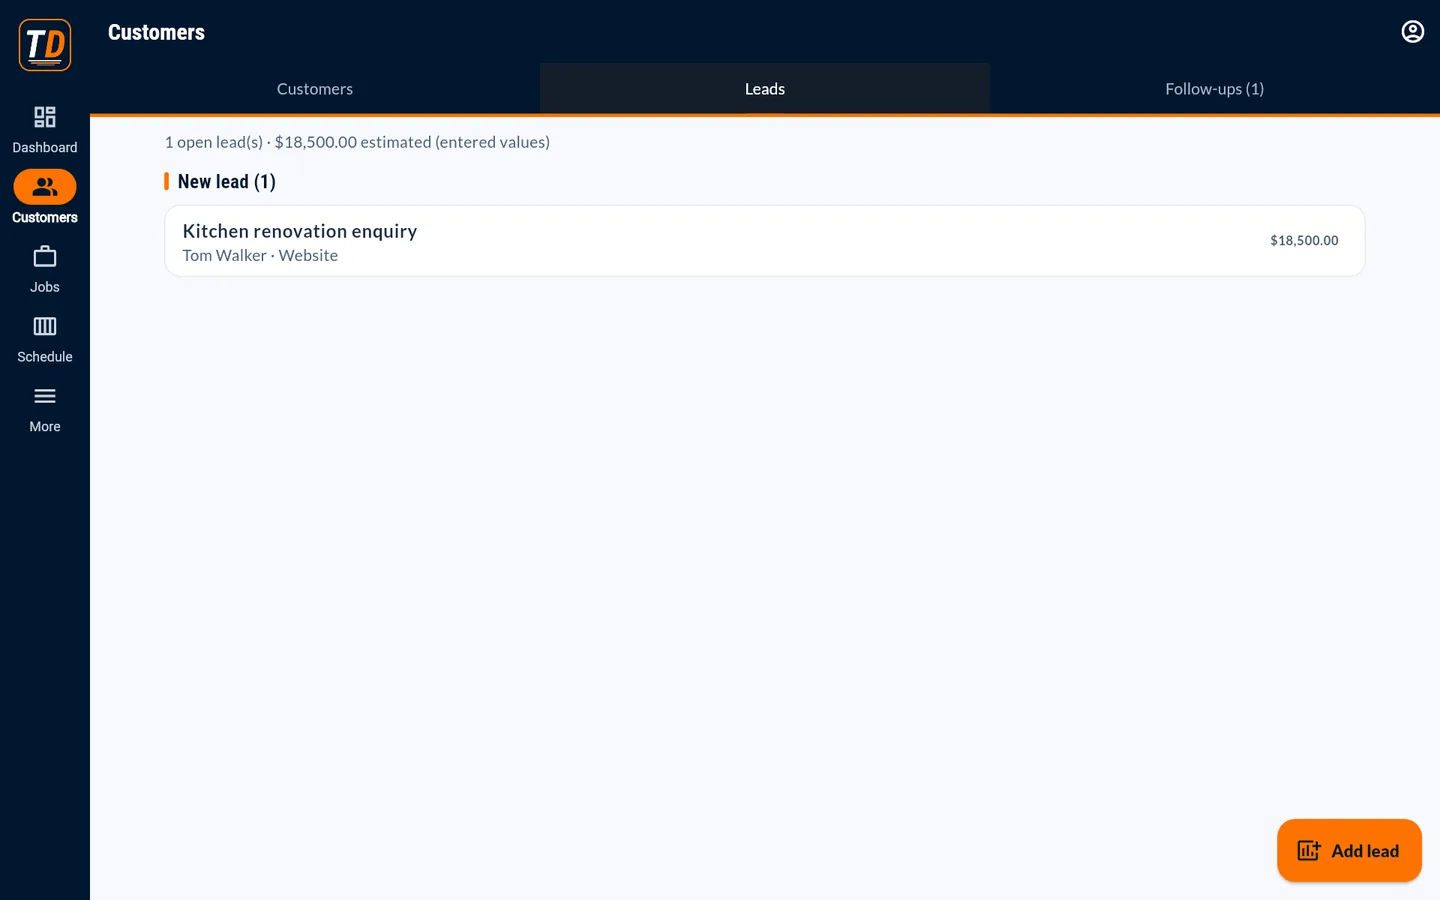
A lead is an enquiry that is not work yet: who asked, what for, its estimated value and its source.
- Go to Customers → Leads → Add lead, or use Quick add → Record a lead / enquiry.
- Move the lead through its stages as you quote and win (or lose) the work.
- Schedule a follow-up so it doesn't go cold (see Follow-ups below).
Creating sites and jobs
A site is the address where work happens. A job is a piece of work at a site, with tasks, people, time, documents, a quote and an invoice.
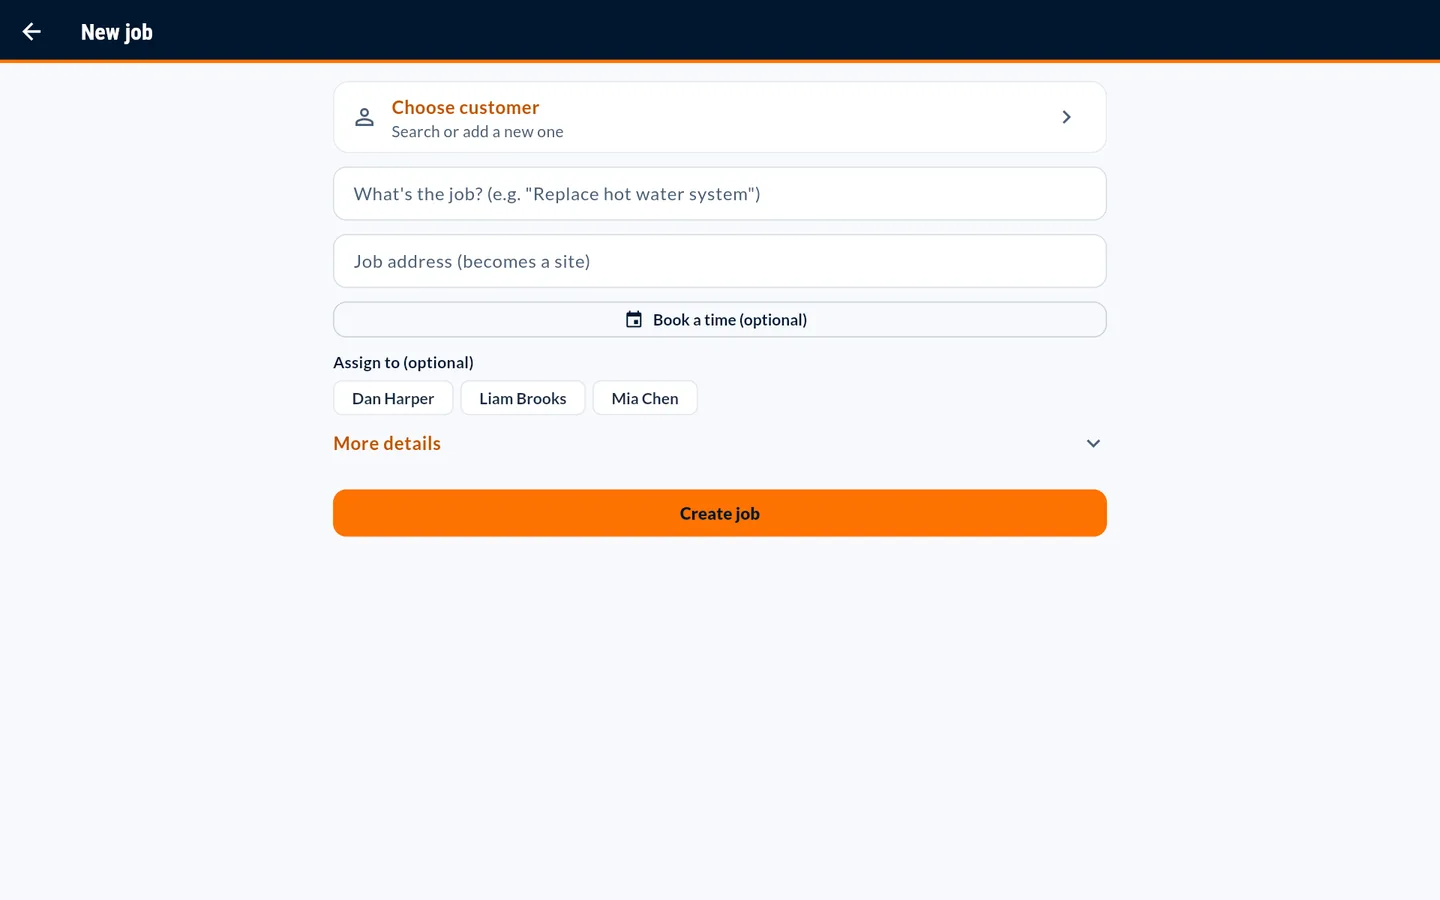
- Go to Jobs → New job (or press New job on a customer).
- Choose the customer (or Add new customer) and the site, or type a new address.
- Name the job and optionally assign workers, then save.
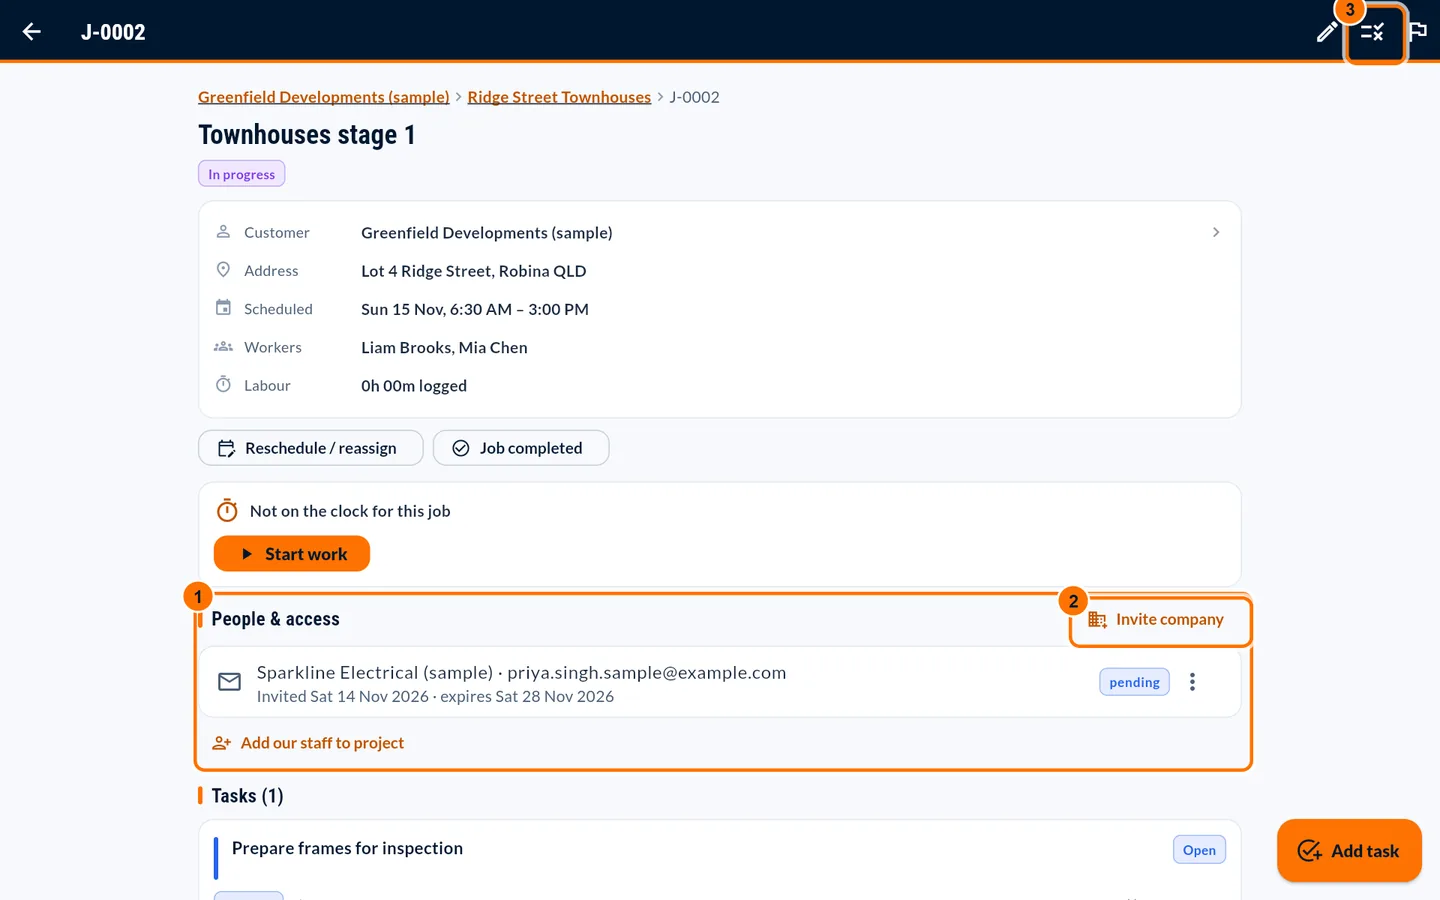
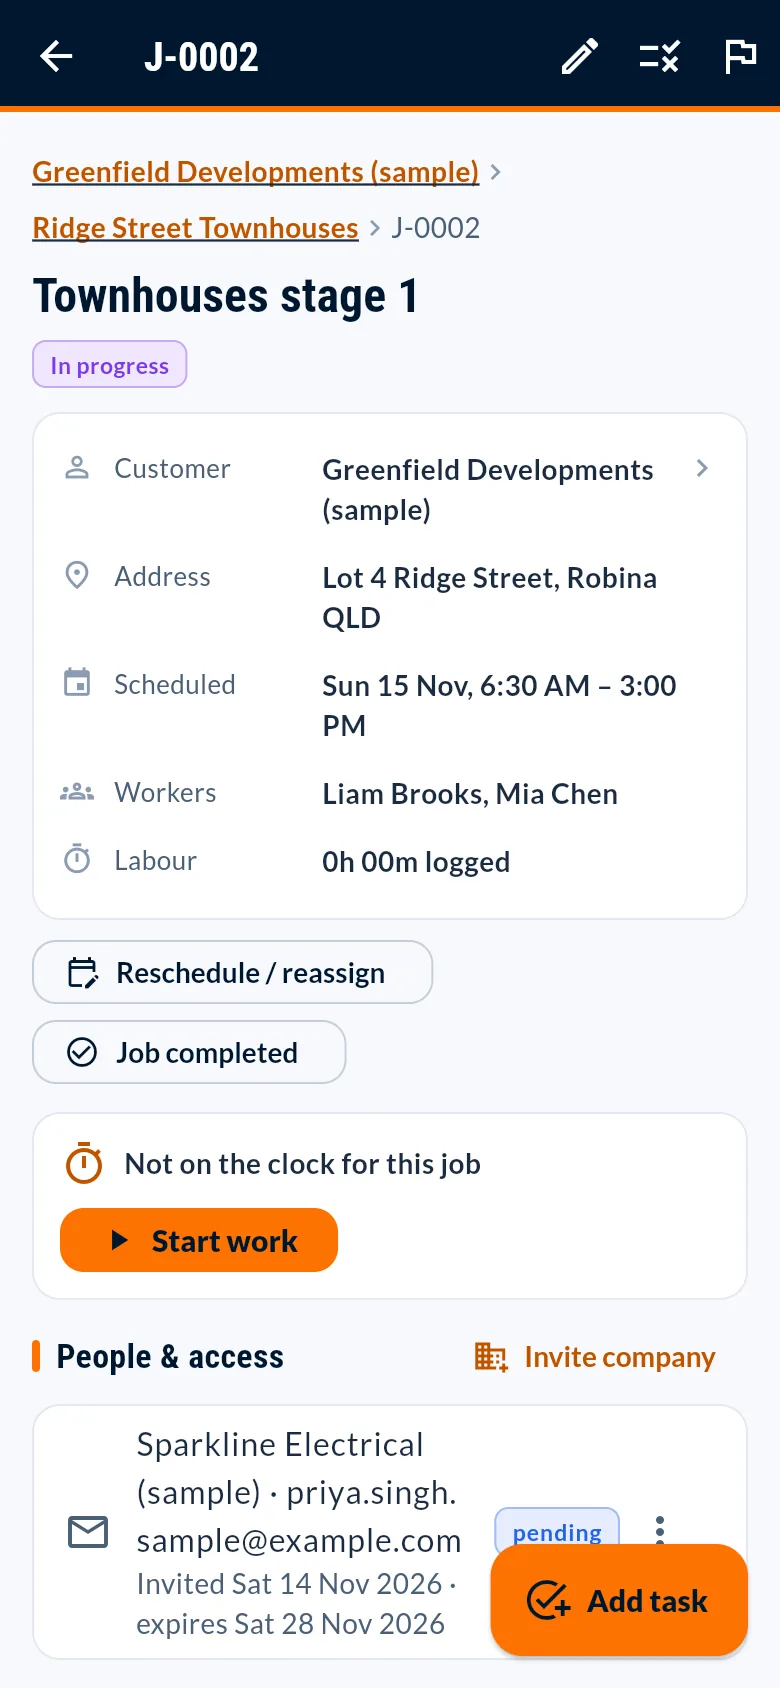
- Open the job to add tasks, set project rules, invite subcontractors and upload documents.
Scheduling workers
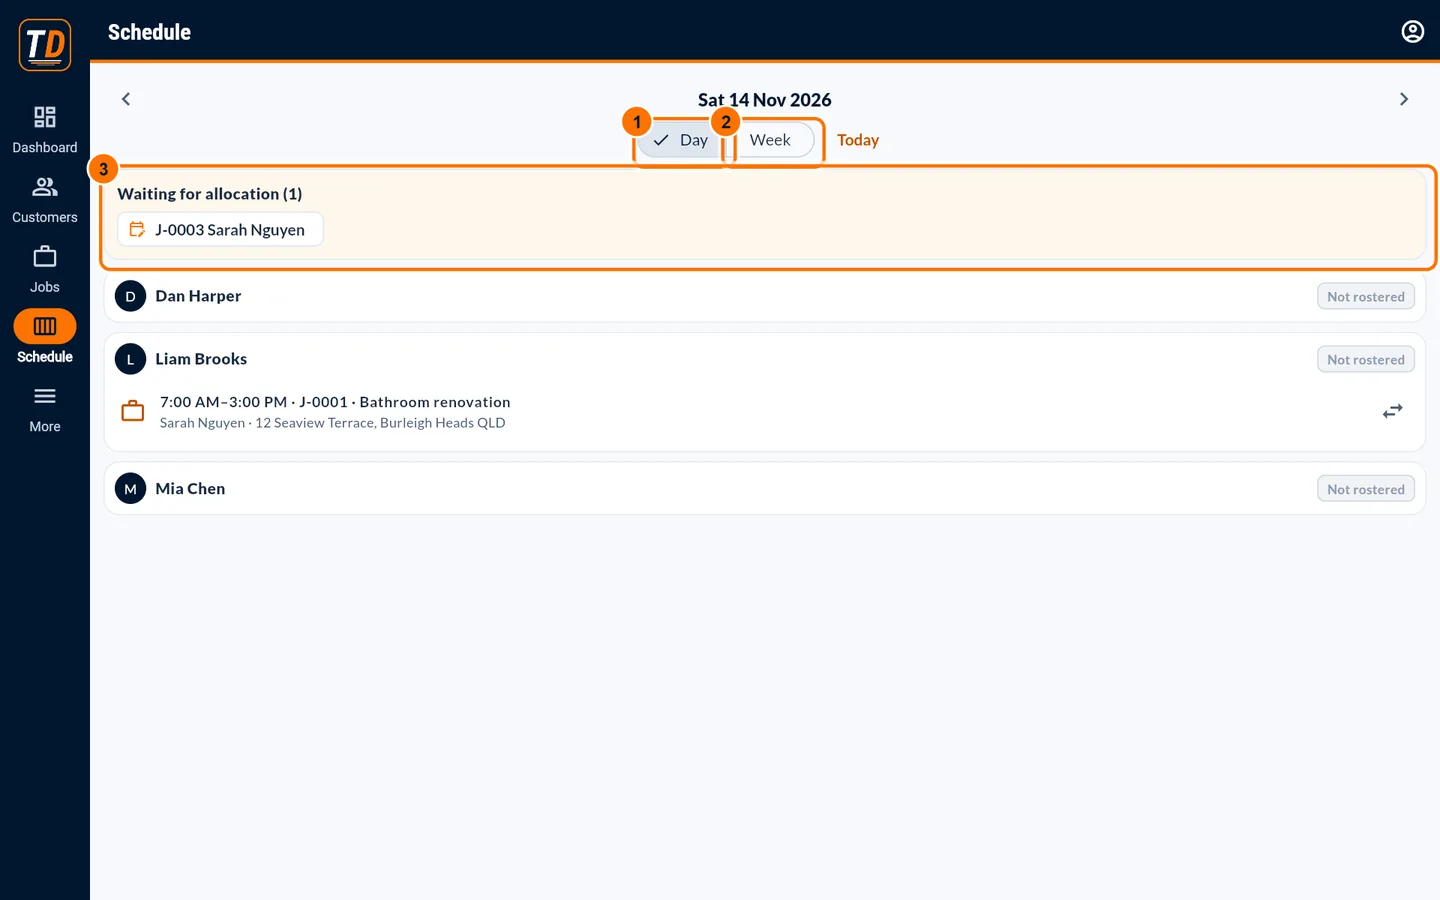
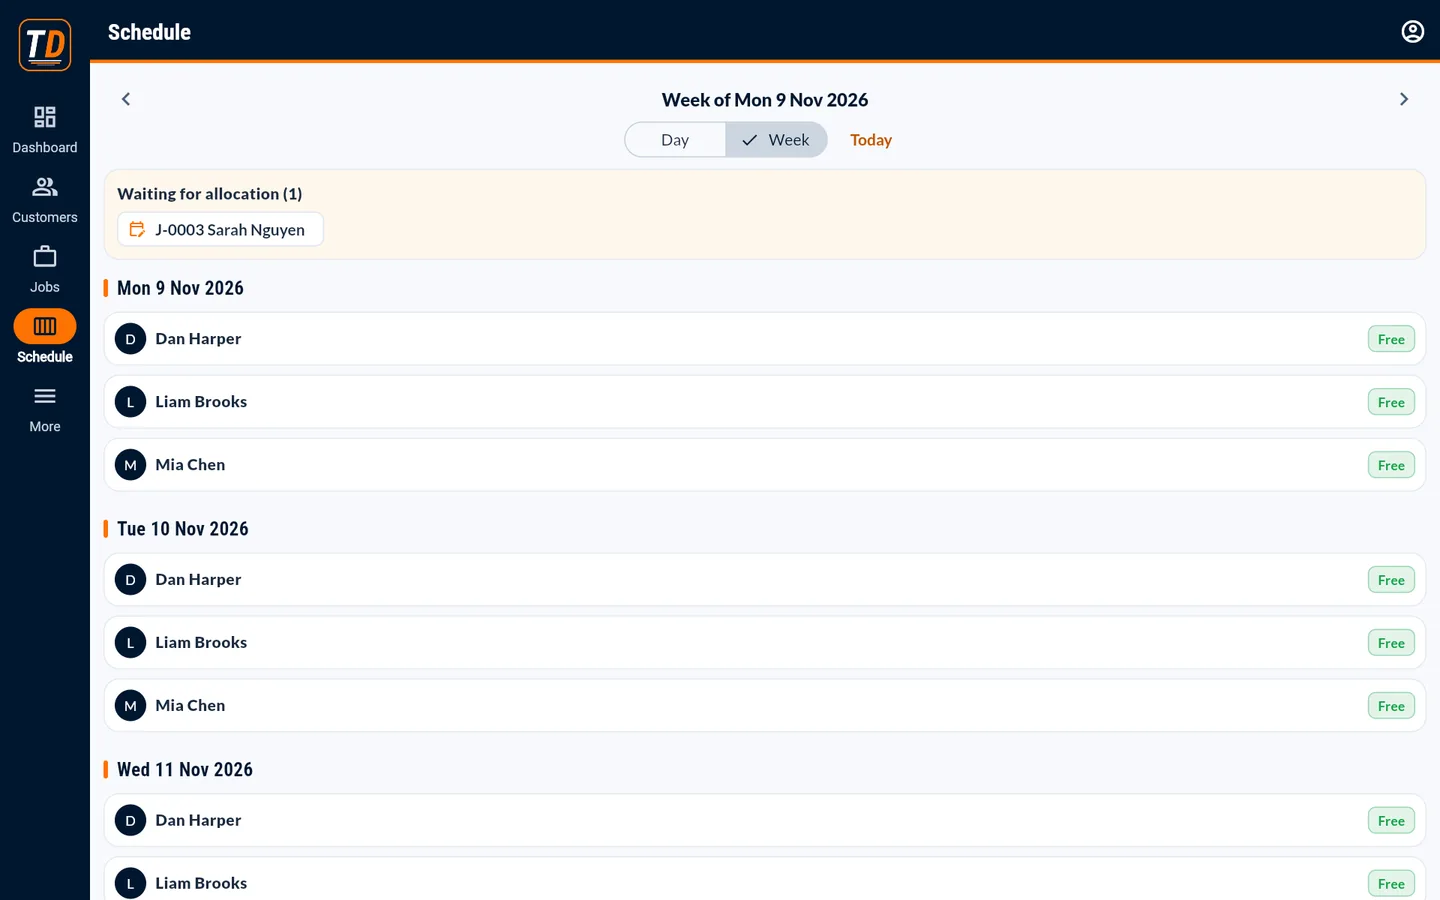
The Schedule shows who is working where, by day or by week. Jobs without a booking wait at the top.
- Open Schedule. Switch between Day and Week, and use the arrows to move between dates.
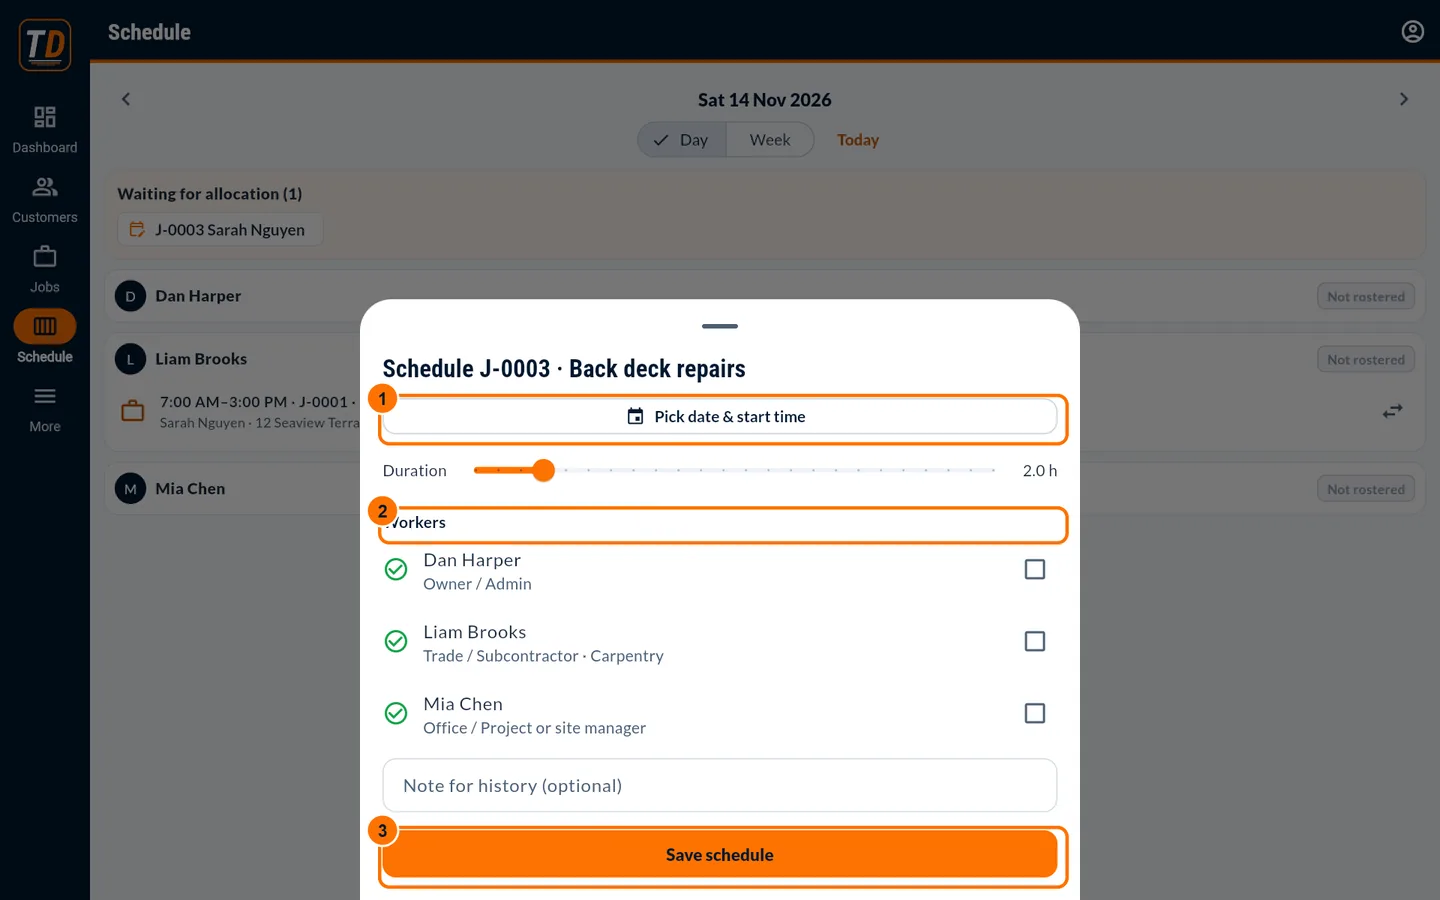
- Tap a job under "Waiting for allocation" (or press Reschedule / reassign on a job).
- Pick the date and start time, set the duration, tick the workers, then press Save schedule.
Common problems
- A worker shows a clash.
- They are already booked at that time. Choose another time or worker.
Delegating tasks
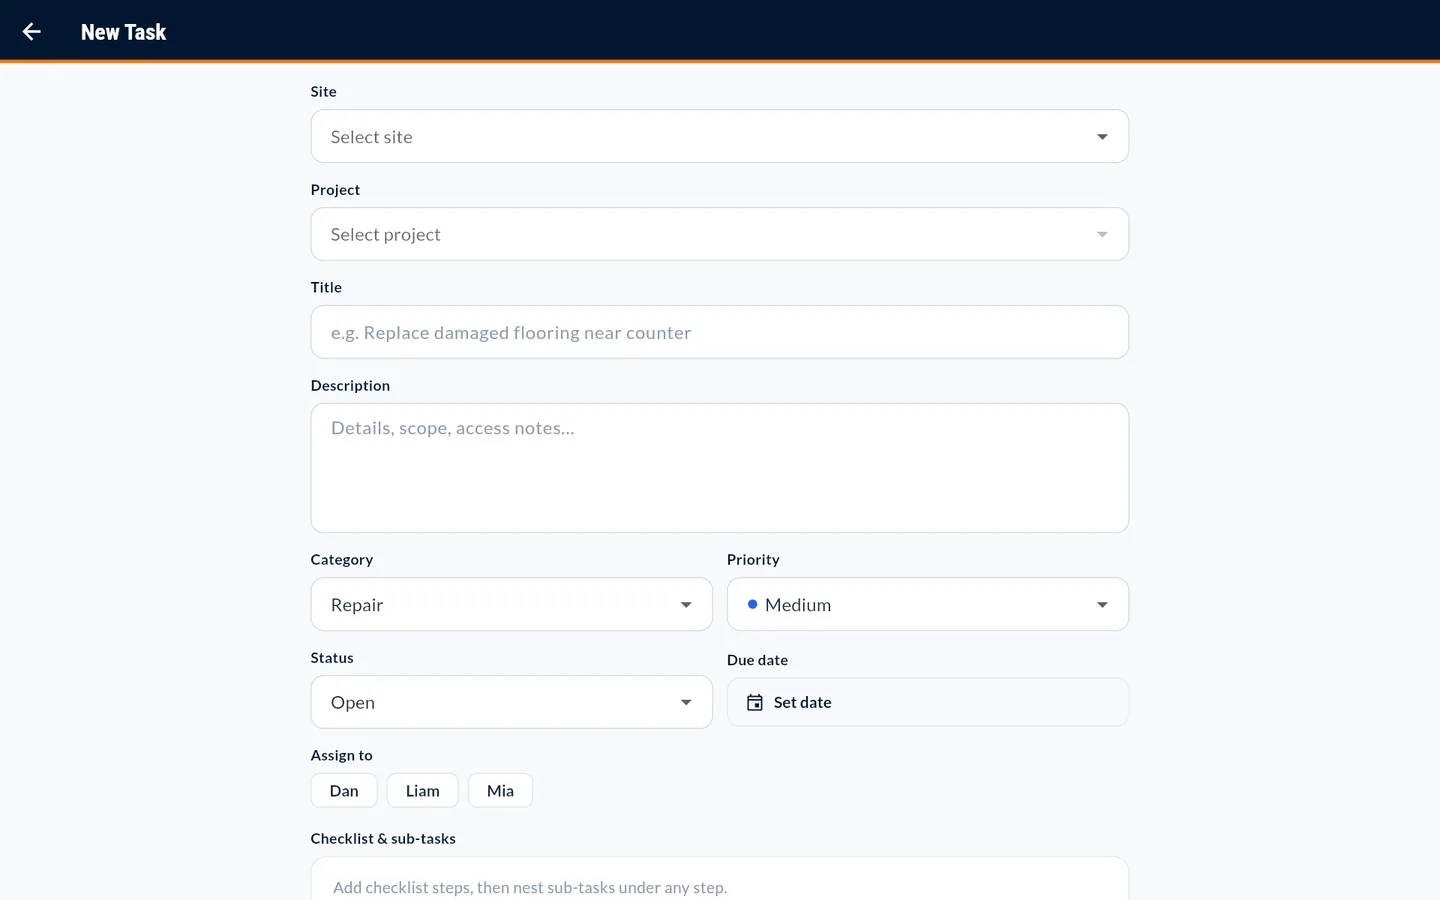
Tasks are the steps of a job. Each can have a due date, priority, checklist, required completion photo and one or more assignees.
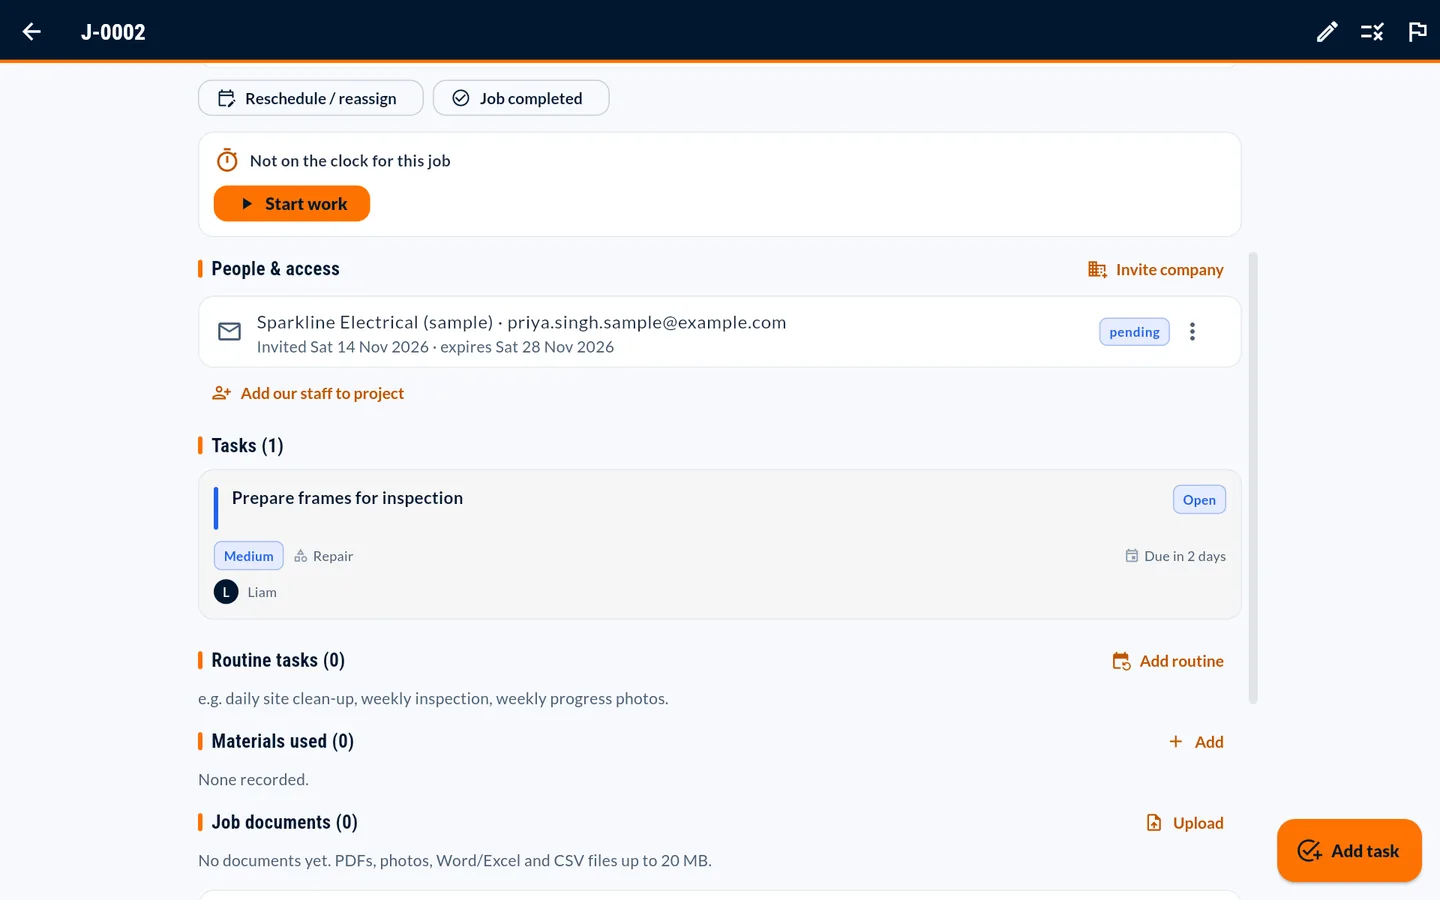
- On a job press Add task, or use Quick add → Add task.
- Enter the title and details, choose the site and job, assign people (or a subcontractor company), and set a due date.
- Watch progress on the job page. When work needs sign-off, press Approve.
Managing subcontractors
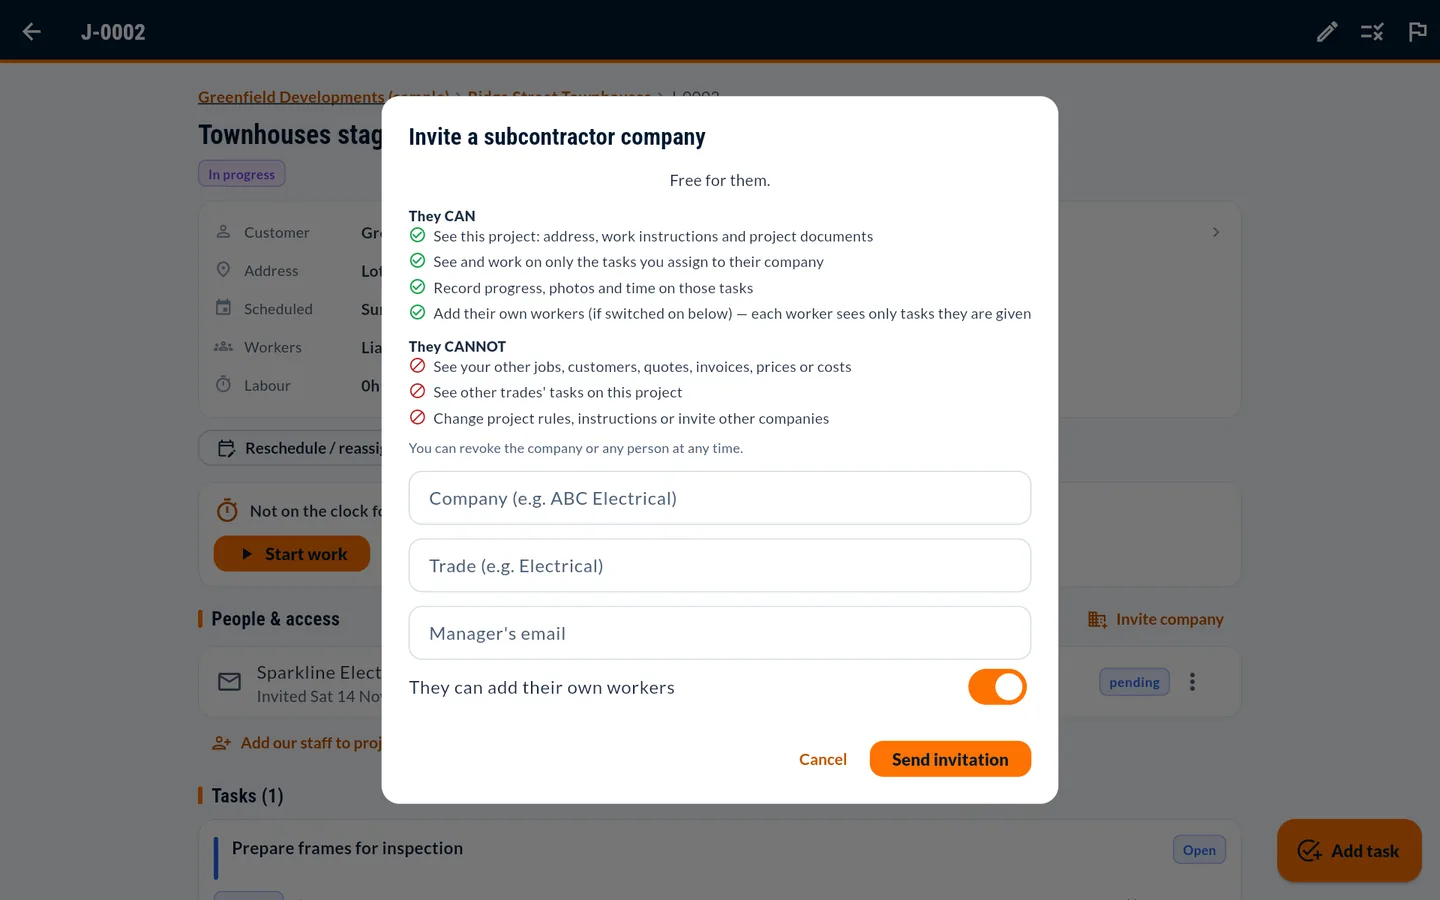
Invite a subcontracting company to one project. They see only that project and only the tasks you give their company. It is free for them.
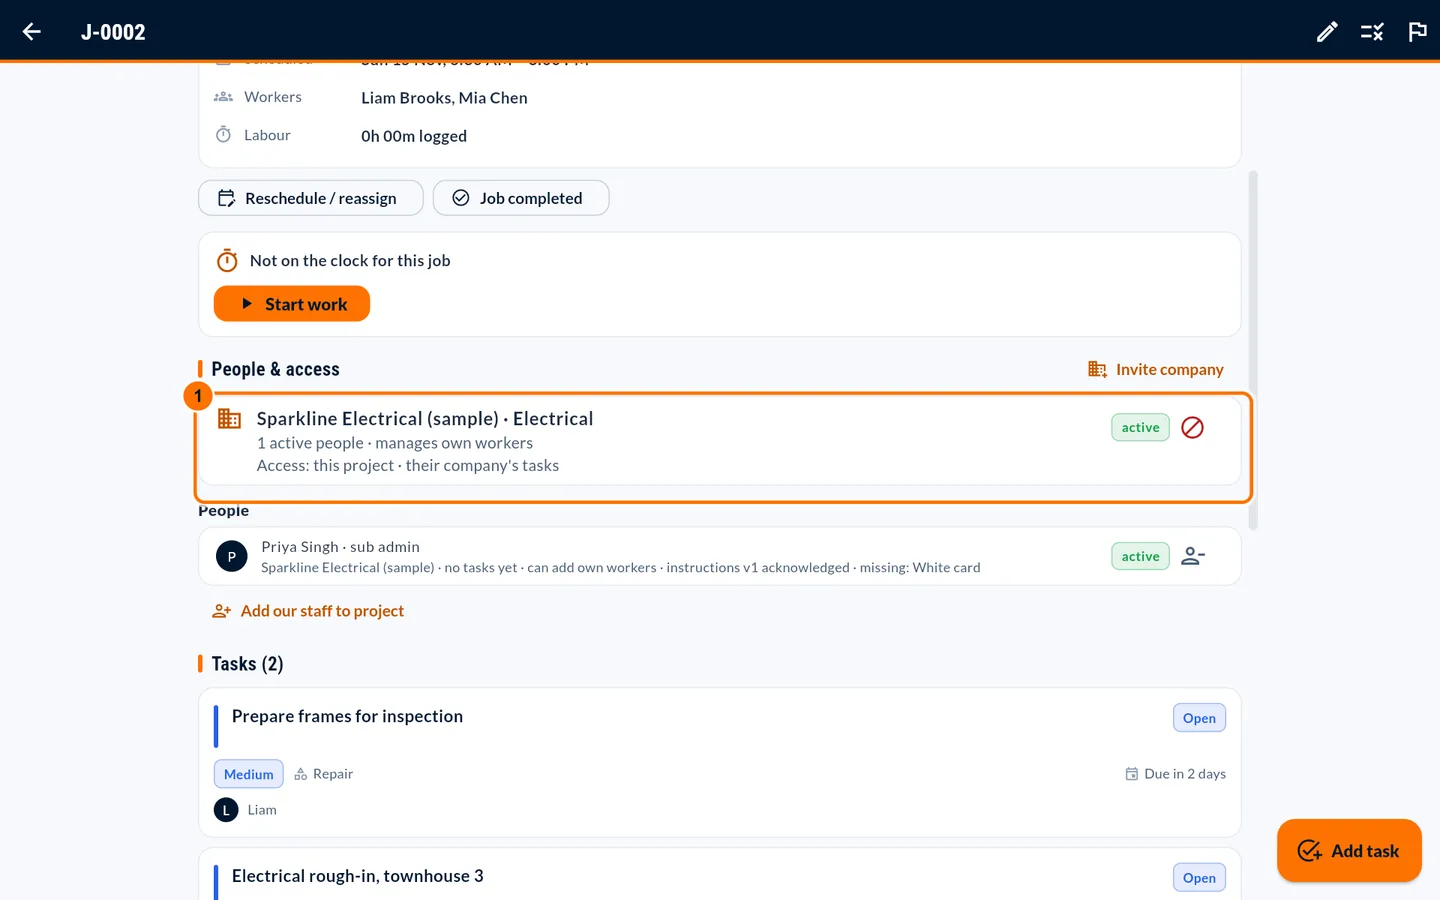
- On the job, under People & access, press Invite company.
- Read the "They CAN / They CANNOT" summary, then enter the company name, trade and the manager's email.
- Choose whether they can add their own workers, then press Send invitation, and text them the message shown.
- Watch their status, people, instruction acknowledgements and missing documents under People & access.
- To remove access, use the menu on the company or person row. It takes effect on their next action, and their history is kept.
Project rules and documents
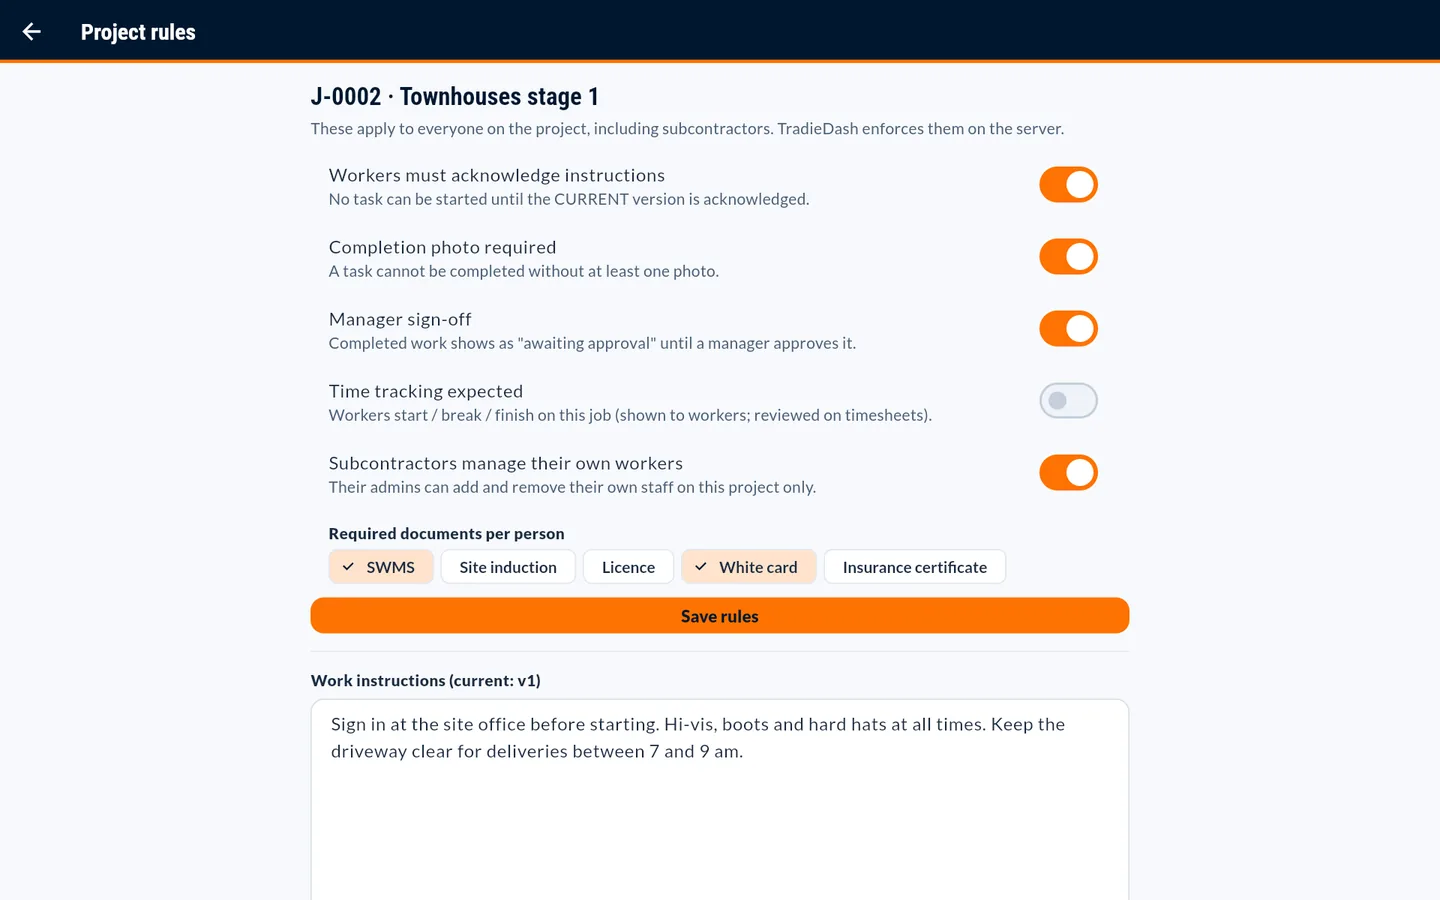
Project rules let you require that instructions are read, that completion photos are taken, and that each person provides documents such as a SWMS or White card.
- On the job press the flag icon (Project rules).
- Write the work instructions and publish them. Publishing a change creates a new version that everyone must acknowledge again.
- Tick the documents each person must provide, and whether a completion photo is required.
- Upload plans and other files under Job documents → Upload (PDF, photos, Word/Excel and CSV, up to 20 MB).
Common problems
- Someone acknowledged the old instructions.
- A new version always needs a new acknowledgement. Old ones don't count.
Recording follow-ups
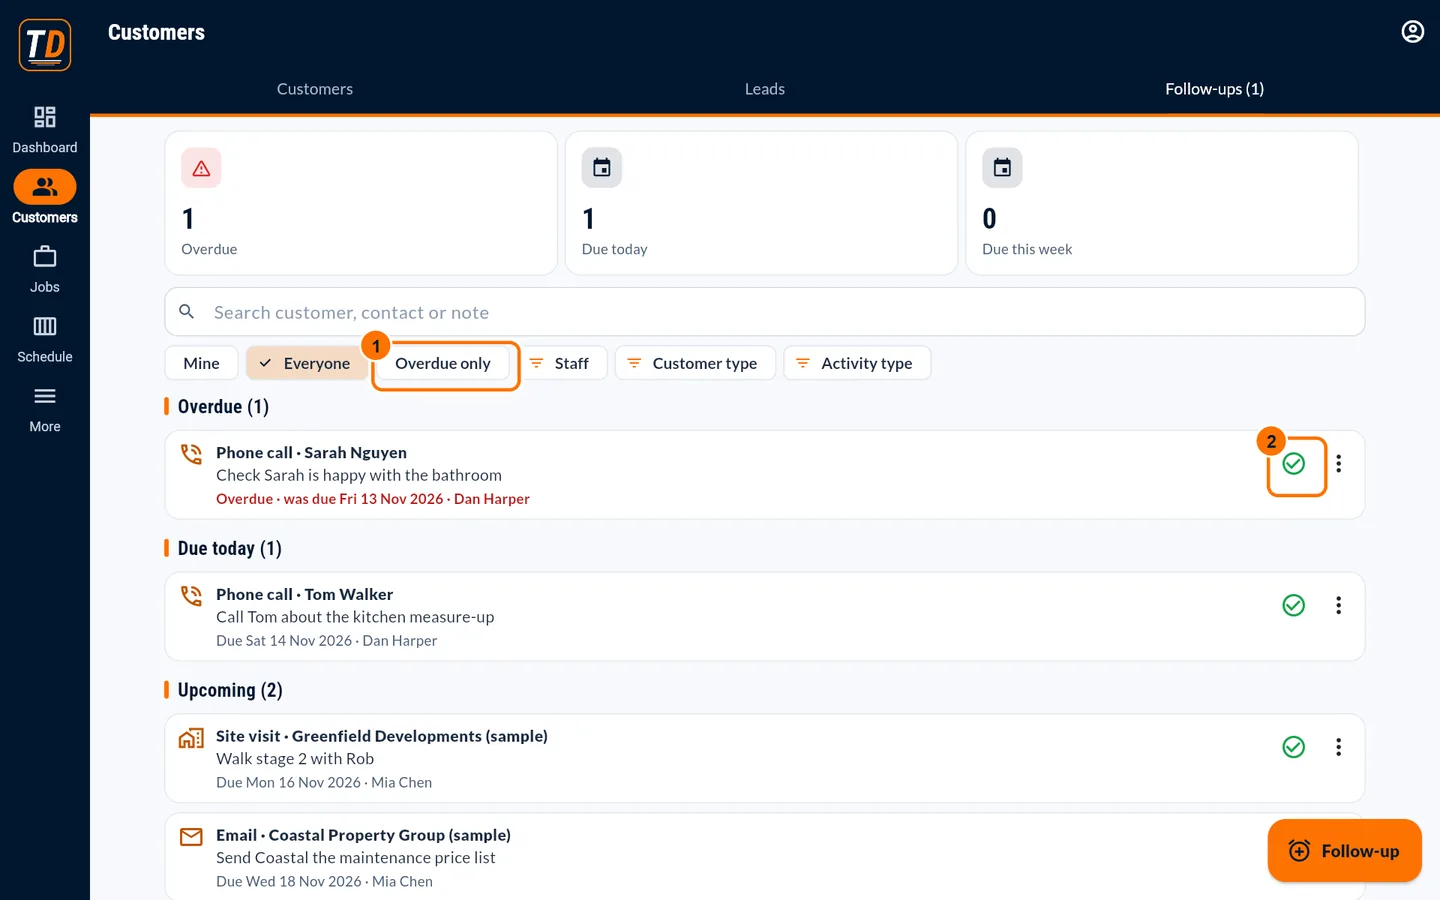
Follow-ups are calls, visits and emails you plan to make, for leads and existing customers alike. TradieDash records them; it does not send messages for you.
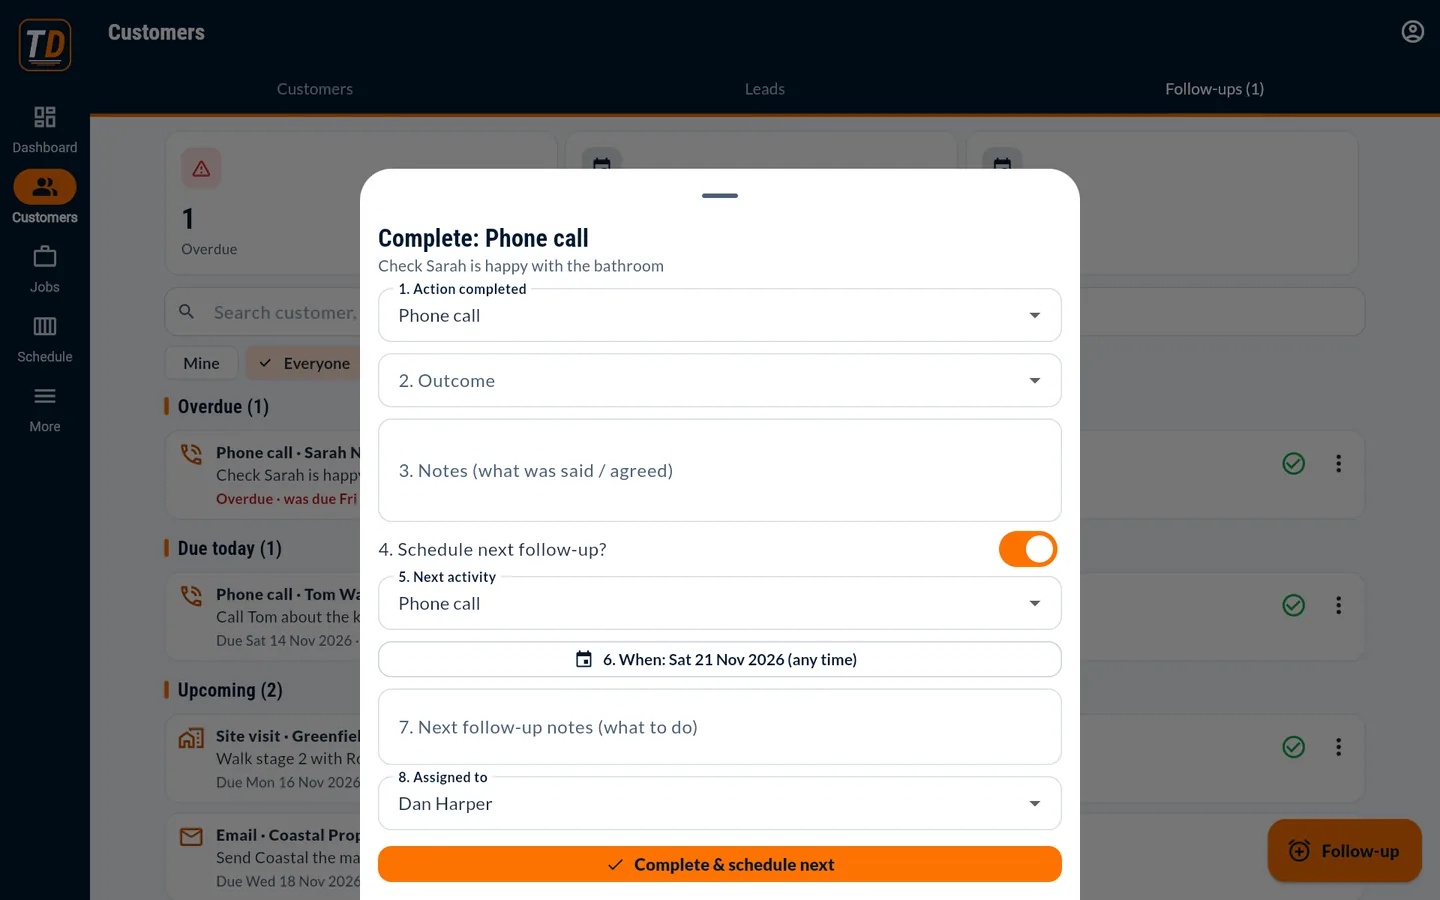
- Go to Customers → Follow-ups. Switch between Mine and Everyone, and use the filters.
- Press Complete… on a follow-up, record the outcome and notes, and schedule the next step in the same form.
- On any customer, press Follow-up to plan the next contact.
Viewing company activity
See what needs attention without opening every job.
- The Dashboard shows jobs today, work in progress, jobs needing scheduling, work to approve, follow-ups overdue, hours this week and more. Tap any tile.
- The bell (top right) shows your notifications.
- Each job keeps its schedule history; each task keeps its own history and notes.
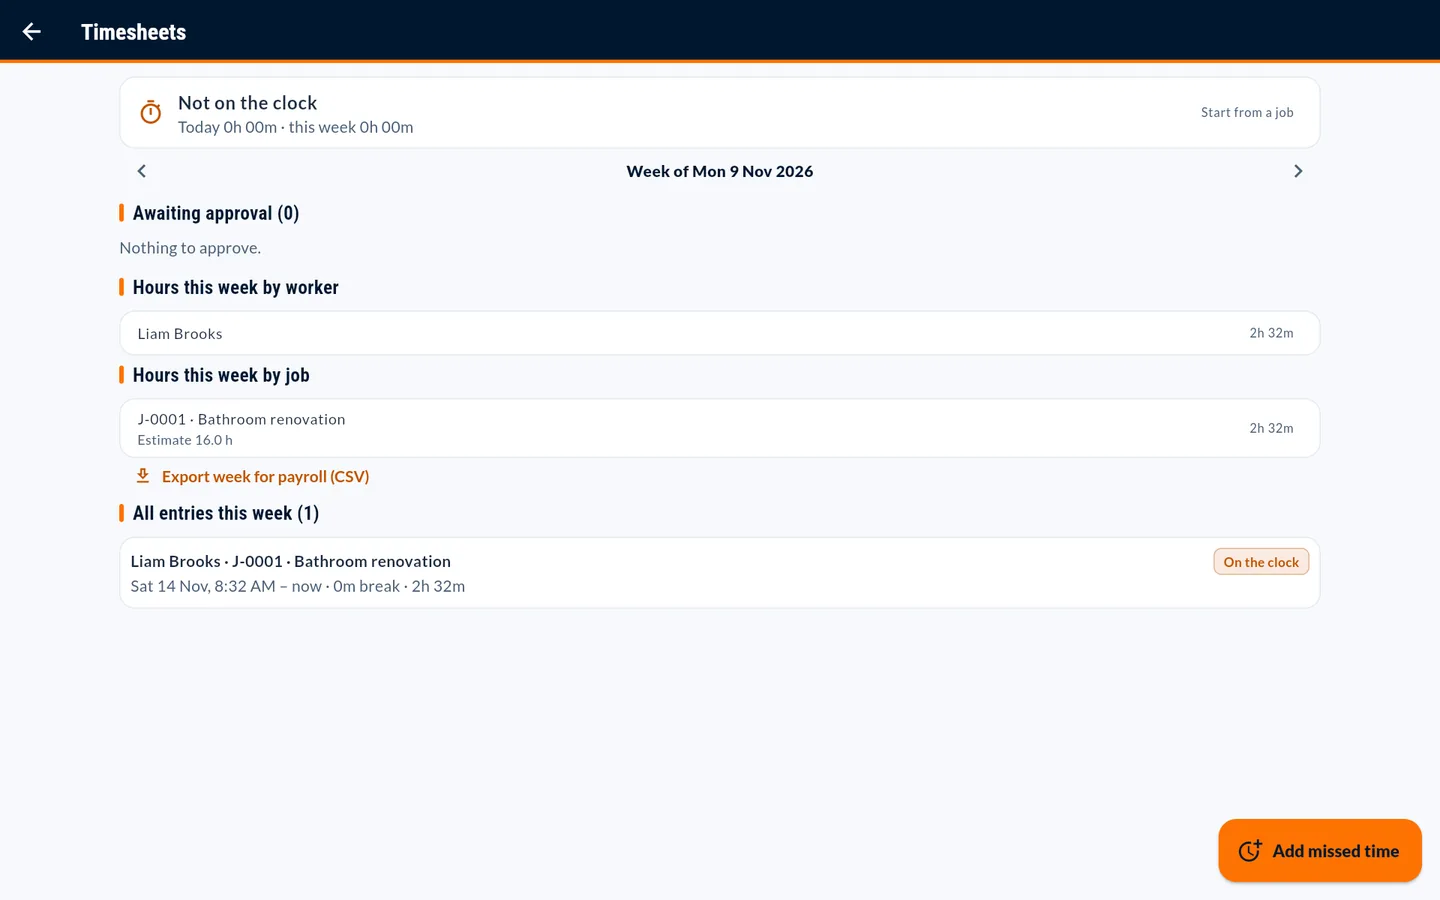
- More → Timesheets shows hours by worker and job for approval. More → Reports exports CSV files.
Managing team permissions
Roles decide what each person can see and do. Only the owner can invite people and change roles.
| Owner / Admin | Everything for your business: team, business settings, customers, jobs, money. |
| Office / Project or site manager | Customers, jobs, scheduling, tasks, follow-ups, quotes and invoices, and subcontractor invitations. Cannot manage the team or edit business settings. |
| Employee / Apprentice, Trade / Subcontractor | Only the jobs and tasks assigned to them, plus their own time. No customer records, prices or invoices. |
| Site manager / Client | A customer's view of their own sites, shared documents and quotes. |
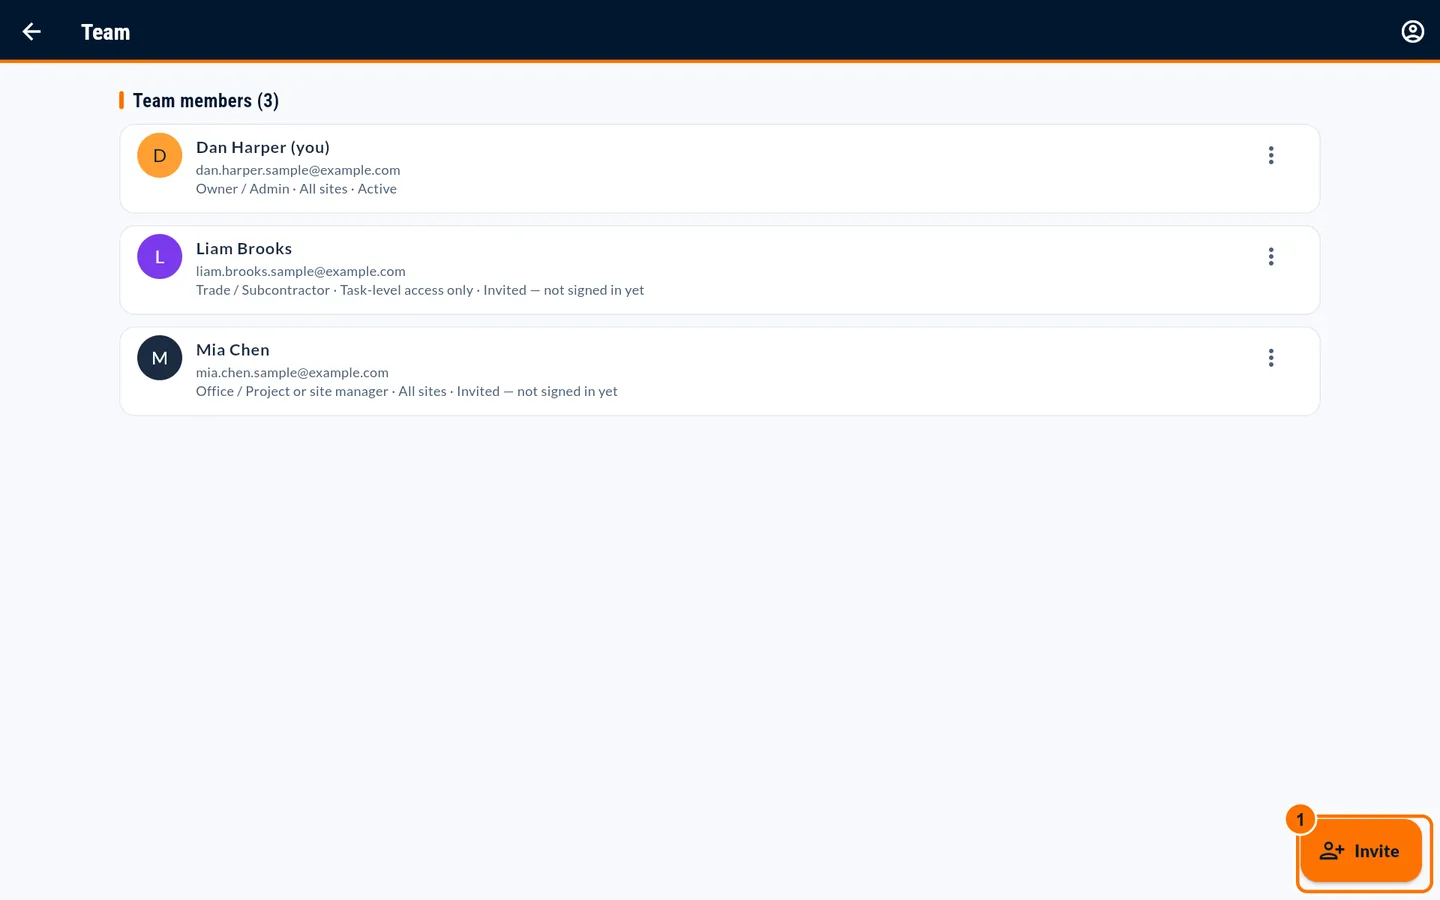
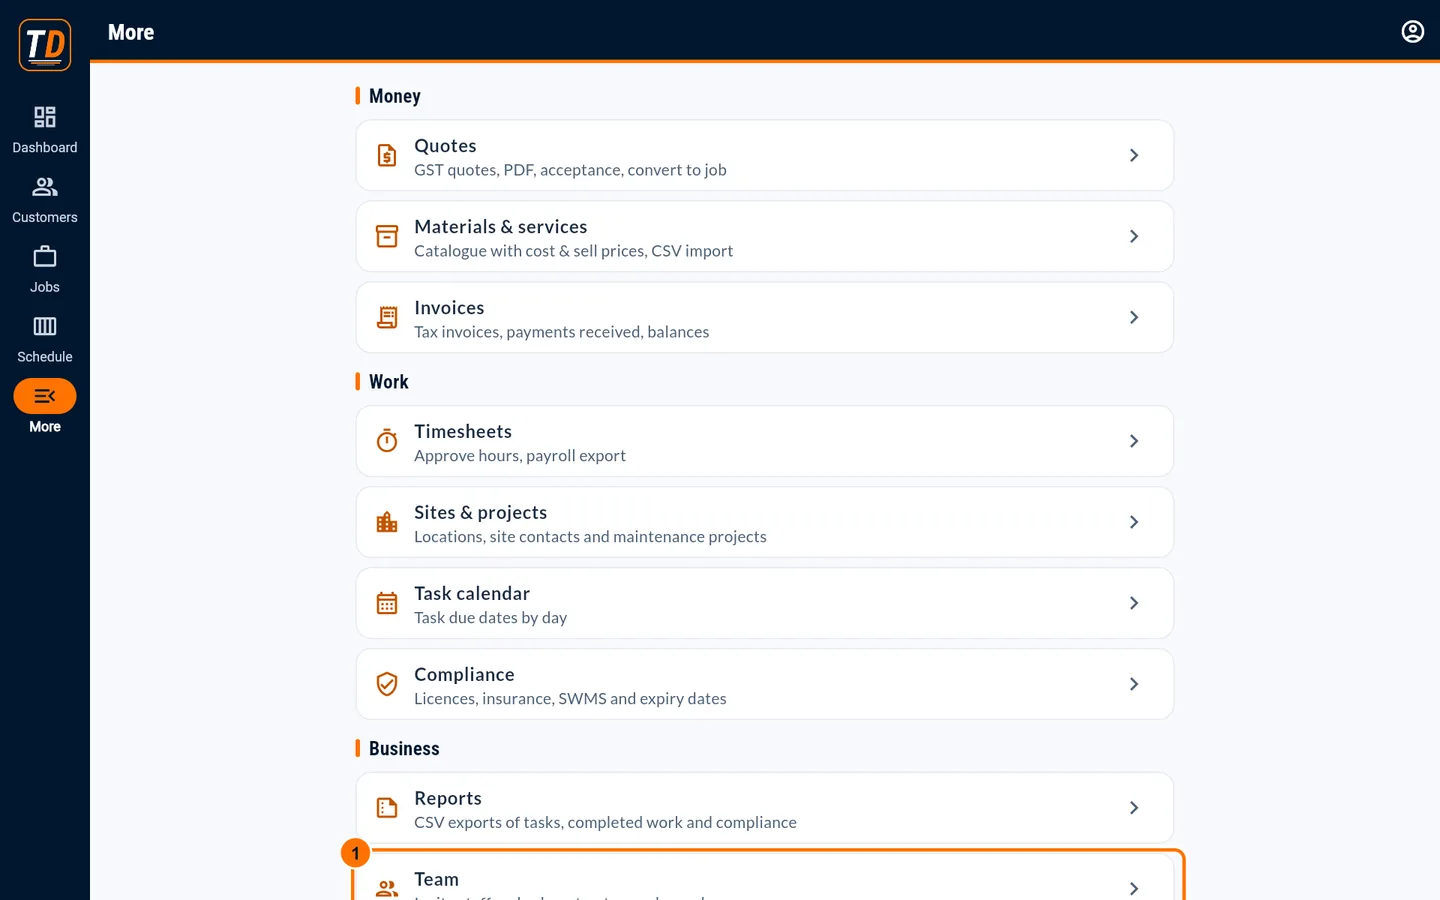
- Go to More → Team. Press Invite user to add someone.
- Use the menu on a person to edit their role and site access, resend their invitation, or deactivate them. Deactivating keeps their history.
Understanding the subscription
TradieDash Starter is AUD $17.99 per month including GST, per business, and you can cancel anytime. Everyone in your team is included, and subcontractors you invite use their projects free.
- See your plan at the top of More → Business settings.
- Founding pilot businesses have complimentary Starter access, with no payment and no expiry.
- New businesses start with a 14-day free trial; the Dashboard shows the days left. Subscribe from More → Business settings → Subscribe (card, through Stripe). Manage subscription updates your card or cancels.
- If online payment has not opened when your trial ends, you keep full access until it does.
Installing TradieDash on a device
Add TradieDash to your phone's home screen or your computer's dock or Start menu.
- Use More → Install the app, or see Installing TradieDash.
Screenshots show a fictional sample business. Your own screens show your data.